
All my experiments with Gatsbyjs has been great so far. I did hit a few bumps along the road, but it was sorted out.
So this is my first tutorial on Gatsbyjs explaining something useful and practical. I transferred by blog from hugo to gatsby and the one immediate thing I felt missing was the blog archive page and the linked pages.
After googling around a bit, I came across this awesome plugin called Gatsby Pagination which solves the problem really well.
With this you can achieve two things:
- Create paginated blog archive page, instead of showing all your posts in a single page. This page can have pagination.
- Link to previous and next page to single blog posts.
Mind that this tutorial assumes you are familiar with gatsbyjs and react. If not, then read the gatsby documentation, it is great. Also for the classnames of the components are bulma specific.
Installation
So first we would install the plugin.
yarn add gatsby-paginationand that's it really.
General Concept
Now we actually need to call the plugin functions within our gatsby-node.js to
create pages. The plugin gives us three useful functions:
createPaginationPages: This one creates paginated archive pages.prefixPathFormatter: Formats theslugorlinksof the blog pages, likehttp://yoursite.com/blog/,http://yoursite.com/blog/2/etc.createLinkedPages: This will create single pages for each of your blog posts and will provideprev,nextas pathContext to the component of your choosing.
So creating them is a two step process. First you use the APIs to pass the pagination and link data to the component of your choosing. Next, within the component, you do what you need to do to create a pagination UI.
Calling the APIs from gatsby-node.js file
Now after using this plugin, your gatsby-node.js file could
export the createPages function like this:
exports.createPages = ({ boundActionCreators, graphql }) => {
	const { createPage } = boundActionCreators;

	return graphql(`
		{
			site {
				siteMetadata {
					title
				}
			}
			posts: allMarkdownRemark(
				sort: { fields: [frontmatter___date], order: DESC }
			) {
				edges {
					node {
						id
						fields {
							slug
						}
						frontmatter {
							title
							date(formatString: "MMMM DD, YYYY")
						}
						excerpt(pruneLength: 400)
					}
				}
			}
		}
	`).then(result => {
		if (result.errors) {
			result.errors.forEach(e => console.error(e.toString()));
			return Promise.reject(result.errors);
		}

		const {
			data: {
				posts: { edges },
				site: {
					siteMetadata: { title, shortTitle },
				},
			},
		} = result;

		// Create Pagination Pages
		createPaginationPages({
			createPage,
			edges: edges,
			component: path.resolve('src/templates/BlogPage.js'),
			limit: 10,
			// pathFormatter: p => (p === 1 ? `/blog/` : `/blog/${p}`),
			pathFormatter: prefixPathFormatter('/blog'),
			context: {
				title,
				shortTitle,
			},
		});

		// Create linked blog pages
		createLinkedPages({
			createPage,
			edges: edges,
			component: path.resolve(`src/templates/blog-post.js`),
			edgeParser: edge => {
				const {
					id,
					fields: { slug },
					frontmatter: { tags },
				} = edge.node;
				return {
					path: slug,
					// additional data can be passed via context
					context: {
						id,
						slug,
					},
				};
			},
			circular: true,
		});
		return Promise.resolve();
	});
};
Here the circular: true is important for the createLinkedPages, otherwise
for some reason, it doesn't seem to work.
Using the data in React Components
Now that we have the data, let's use them.
Create Paginated Blog Archive page
First let's see how the src/templates/BlogPage.js could look like.
import React from 'react';
import PropTypes from 'prop-types';
import Link from 'gatsby-link';
// A custom component to actually link the blog page from excerpt
import BlogCard from '../../components/BlogCard';
// A sweet helper function to create pagination object
const createPaginationObjects = (length, page, increment = 2) =>
Array.from({ length }, (_, i) => ({
link: `/blog/${i + increment}/`,
index: i + increment,
current: page === i + increment,
}));
// Our BlogPage Component
const BlogPage = ({ pathContext }) => {
const {
nodes,
page,
prev,
next,
pages,
total,
shortTitle: siteTitle,
} = pathContext;
// Create the navigation link
let navItems = [
{
link: `/blog/`,
index: 1,
current: page === 1,
},
];
if (pages <= 5) {
navItems = [
...navItems,
...Array.from({ length: pages - 1 }, (_, i) => ({
link: `/blog/${i + 2}/`,
index: i + 2,
current: page === i + 2,
})),
];
} else {
// We have a situation where we have to show the first
// item, three items around the current one
// and also the last item
/* eslint-disable no-lonely-if */
if (page <= 3) {
// If the current one is closer to the start
navItems = [
...navItems,
...createPaginationObjects(3, page),
{
separator: true,
index: 'starter-separator',
},
{
link: `/blog/${pages}/`,
index: pages,
current: false,
},
];
} else if (page > pages - 3) {
// If the current one is closer to the last one
navItems = [
...navItems,
{
separator: true,
index: 'finisher-separator',
},
...createPaginationObjects(4, page, pages - 3),
];
} else {
navItems = [
...navItems,
{
separator: true,
index: 'starter-separator',
},
...createPaginationObjects(3, page, page - 1),
{
separator: true,
index: 'finisher-separator',
},
{
link: `/blog/${pages}/`,
index: pages,
current: false,
},
];
}
/* eslint-enable */
}
return (
<section className="section">
<h2 className="title is-2">{`${siteTitle} – Blog`}</h2>
<h5 className="subtitle is-5">{`Showing Page ${page} of ${pages} · Total ${total} articles`}</h5>
<div className="columns is-desktop is-multiline">
{nodes.map(item => {
const {
node: {
excerpt,
fields: { slug },
frontmatter: { date, title },
id,
},
} = item;
const cardProps = {
excerpt,
date,
title,
slug,
};
return (
<div className="column is-full" key={id}>
<BlogCard {...cardProps} />
</div>
);
})}
</div>
<nav className="pagination">
{prev && (
<Link to={prev} className="pagination-previous">
Previous
</Link>
)}
{next && (
<Link to={next} className="pagination-next">
Next page
</Link>
)}
<ul className="pagination-list">
{navItems.map(item => (
<li key={item.index}>
{item.separator ? (
<span className="pagination-ellipsis">
…
</span>
) : (
<Link
to={item.link}
className={`pagination-link ${
item.current ? 'is-current' : ''
}`}
aria-label={`Goto page ${item.index}`}
>
{item.index}
</Link>
)}
</li>
))}
</ul>
</nav>
</section>
);
};
BlogPage.propTypes = {
pathContext: PropTypes.objectOf(PropTypes.any).isRequired,
};
export default BlogPage;Your mileage will vary here, but you get the concept. Extract the data from
pathContext and create pagination. It will render something like this.
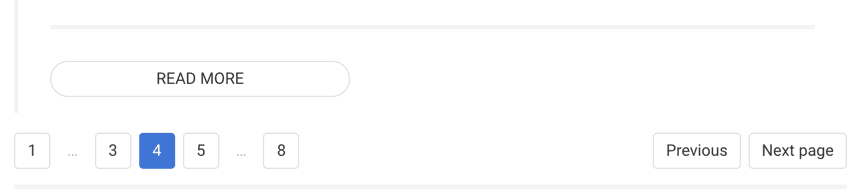 .
.
Create Linked Single Blog Page
Our src/templates/blog-page.js file needs a little more work. It gets passed
the post id and prev, next as context. Now we will use graphql to query
data based on that.
It could very much look like this.
import React from 'react';
import PropTypes from 'prop-types';
import Link from 'gatsby-link';

const BlogPost = ({ data }) => {
	const {
		post: {
			html,
			frontmatter: { title, date },
			fields: { slug },
		},
		prevPost,
		nextPost,
	} = data;

	return (
		<section className="single section">
			<h1 className="title is-1">{title}</h1>
			<h2 className="subtitle is-3">{`On ${date}`}</h2>
			<article
				className="content"
				dangerouslySetInnerHTML={{ __html: html }}
			/>
			<nav className="post-navigation" aria-label="pagination">
				{nextPost && nextPost != null ? (
					<Link
						to={nextPost.fields.slug}
						className="post-navigation__previous button is-outlined is-link is-rounded"
					>
						<span className="post-navigation__label">
							{nextPost.frontmatter.title}
						</span>
					</Link>
				) : null}
				{prevPost && prevPost != null ? (
					<Link
						to={prevPost.fields.slug}
						className="post-navigation__next button is-outlined is-link is-rounded"
					>
						<span className="post-navigation__label">
							{prevPost.frontmatter.title}
						</span>
					</Link>
				) : null}
			</nav>
		</section>
	);
};

BlogPost.propTypes = {
	data: PropTypes.shape({
		post: PropTypes.object,
		prevPost: PropTypes.object,
		nextPost: PropTypes.object,
		pageBG: PropTypes.object,
	}).isRequired,
	pathContext: PropTypes.shape({
		prev: PropTypes.string,
		next: PropTypes.string,
	}).isRequired,
};

export default BlogPost;

export const pageQuery = graphql`
	query BlogPostByID($id: String!, $prev: String!, $next: String!) {
		post: markdownRemark(id: { eq: $id }) {
			id
			html
			frontmatter {
				date(formatString: "MMMM, YYYY")
				title
			}
			fields {
				slug
			}
		}
		prevPost: markdownRemark(fields: { slug: { eq: $prev } }) {
			frontmatter {
				title
			}
			fields {
				slug
			}
		}
		nextPost: markdownRemark(fields: { slug: { eq: $next } }) {
			frontmatter {
				title
			}
			fields {
				slug
			}
		}
	}
`;
This will create pagination buttons below your article.
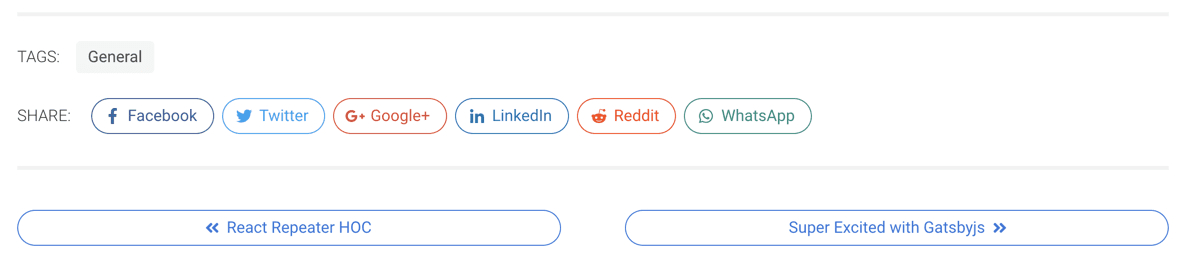
Again adjust this within your own template file.
For a full featured one, I suggest checking out my blog's repository which you can use as a starter too 😉.
That's all for today. In the next one I will write about using react-share to
show social sharing buttons on your gatsbyjs blog.